
Although I briefly considered alternatives (including Kato) I quickly realised that I would be buying Peco track. It's readily available and there is a good range.
I did build a quick trial layout using Peco Setrack and considered making the permanent but decided I wouldn't be happy with the look for a permanent layout. It was very useful for testing ideas though.
The joints between tracks are very "clunky"
The choice came down to either Code 80 or Code 55. It was Hobson's Choice as the points I needed were only available in code 55.
I read all the advice on wiring the track and came to my own conclusions (particularly as some of the advice was contradictory). The main things I decided were that each section of track must have its own connection to the Bus (see Wiring) and preferably two connections and that I wanted the wiring to be concealed. That was going to mean soldering - something I'm not too good at (although I'm getting better with time). The way I did this is best shown with a picture or two.
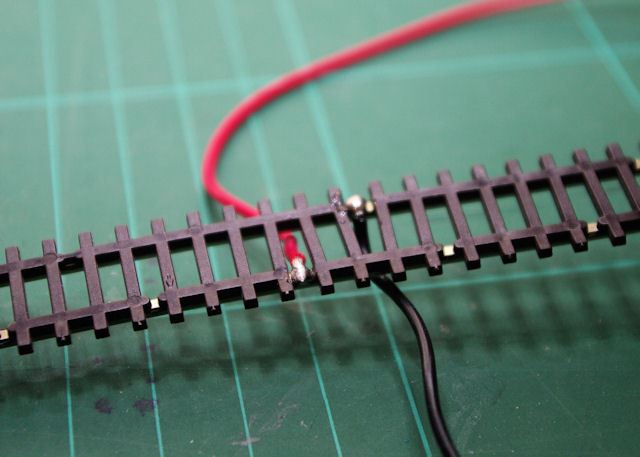
I told you the soldering isn't brilliant!
All I did was to cut out a short section of the track base to expose the underside of the rail - common sense says to use the existing cuts in flexitrack. I cleaned up and slightly roughened the rail with a fine diamond file then tinned it with solder. I stripped a short end of each wire, tinned that as well then brought the two together - no additional solder was needed just a couple of seconds with a hot iron.
Once the joint had dried I took the wire back up through the track as shown to simplify laying (this is fairly tough on the joint so a good test - only one failed).
With curved track it's important to get the track bent to the correct radius before you solder on the dropper wires otherwise they'll prevent the track bending and cause the sleepers to deform.
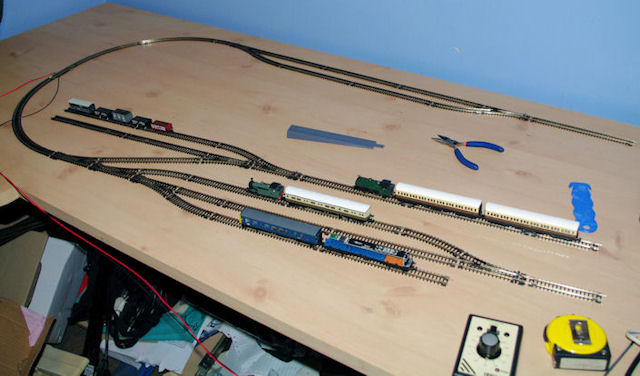
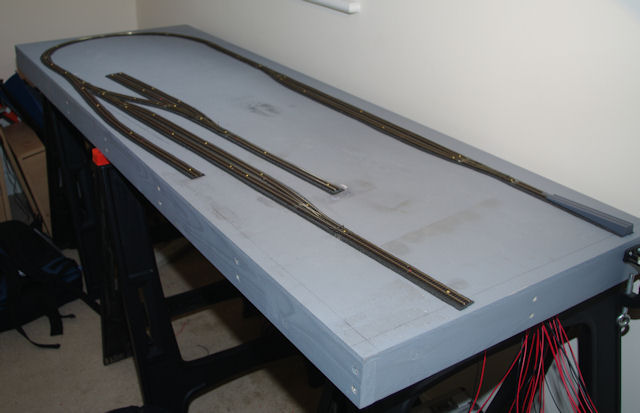
If you've read this far you've should have already seen the page on Laying the Track-bed. The centreline of this gave me the line of the track, with pins left in to mark the point locations. At this stage I chose to use fine screws to hold the track in place - these will remain until the ballast goes down and allowed easy adjustment. Actually getting fine enough screws for N gauge wasn't easy! These are imperial sized brass ones found on EBay.
A picture paints a thousand words!
Once each length of track was in place and secured I could drill through the bed and baseboard with a fine drill and pull the wires down underneath for later connection to the bus.
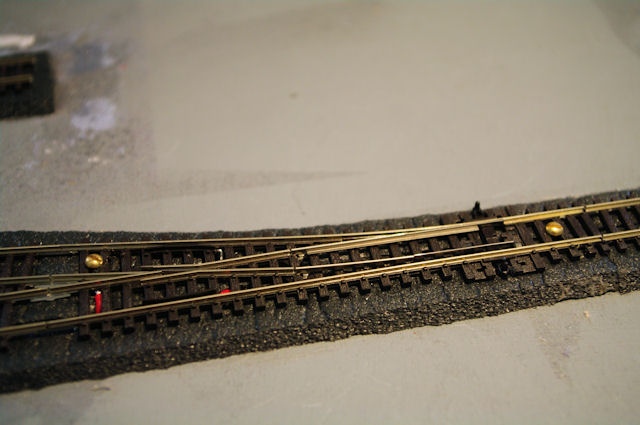
I used standard Peco fishplates between sections of track, with metal ones everywhere except for the connections to the frogs of the points (which need to be isolated and switched). Getting these on and the track connected is fiddly, you just have to keep trying. I had some problems with getting some of the curves to go where I wanted, but succeeded in the end.
The most troublesome joint!
Unfortunately the top curve on the layout was about 1.1m long so a joint on the curve was inevitable. I eventually managed to get this in at the apex of the curve and get a reasonable alignment - it might get a bit more adjustment once I start test running. When jointing I tended to cut the sleepers back a reasonable distance. I've got plenty of extra sleeper packs to slide in to place later. I did get a little bit of deformation on the sleepers from the droppers to the left of this joint but not enough to worry about (it is a preserved railway after all, not a high speed main-line!)
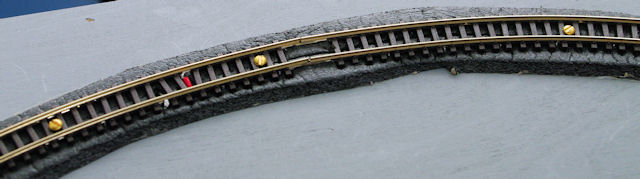
There are at least three theories on the best way to do this! The "traditional" way is with a fine-tooth saw and mitre block, but technology has probably overtaken this a bit. The two main methods are using a Dremel-type tool with a cutting disc or a Xuron track cutter. All I'll say on the subject is having tried the former I bought the latter! Even using the track cutter a few strokes with a diamond file will clean up the edges and make getting the fishplates on easier.
The Peco rerailer is part of the testing routine - I would roll wagons and coaches down across the points to see if they derailed at all!